How to Prepare for QuarantineI'm writing this in the wake of the COVID-19 scare that's currently spreading around the globe, but all of these steps will work equally as well for any situation that may cause you to have to want to quarantine in your home. Depending on how bad a certain disease gets you could even be forced to quarantine in your home. Let's look at why you would want to quarantine, the supplies needed, how to quarantine, and when it may be safe to come back out. [/wc_toggle] [wc_box color="inverse" text_align="left" margin_top="" margin_bottom="" class=""] Thanks for supporting Ready Lifestyle! We participate in the Amazon associates program and other affiliate programs. We earn a small commission on qualifying orders at no expense to you. Preparing for a QuarantineA quarantine is designed to separate sick (and possibly contagious) people from those people that aren't sick. It's one of the most effective ways to prevent the spread of disease but it's also very restrictive, so it's often only used as a last-ditch effort when nothing else is working. This is especially true when you're dealing with a highly contagious disease that has a long incubation period and like the Coronavirus. When a disease can be spread, even when you don't show symptoms, quarantine is usually a good idea. [wc_box color="primary" text_align="left" margin_top="" margin_bottom="" class=""] Download our home quarantine cheat-sheet here. Additional Things to Consider About a QuarantineQuarantine is obviously going to seriously change how you go about your daily life. With that change, there are some things that need to be considered. If you have kids in school then you need to be prepared to make arrangements for them to keep up with their education from home. You can do this by contacting their school and getting assignments ahead of time or possibly even arrange for some kind of teleschool set-up. Kids will benefit from some kind of normalcy in their lives if they're forced to quarantine. You're going to want to arrange to work from home if you can. If you work a job that doesn't lend itself to working from home, then you're going to potentially experience a loss of pay and even a loss of your job if you decide to quarantine yourself without being forced to by a government agency. It's a tough call, but it's one that you may be forced to make! If you have a need for ongoing medical care, see if your doctor offers the option of telemedicine (e-health, telehealth, whatever you want to call it). This is where you can consult your physician remotely in the same way that you can by going into the office. If your doctor doesn't offer the option, then there are a ton of places popping up on the internet that will prescribe medications and offer health advice via the internet. When to Quarantine in Your HomeNo one really wants to quarantine in their home, but there are some times when it's the only thing that you can really do to protect yourself. When to quarantine in your home:
Ultimately, deciding to self-quarantine is usually done as a way to prevent you from spreading the disease to others and not the other way around. What to Stock for QuarantineIn order for a quarantine to be successful, you need to be able to stay inside for the entire time without exposing yourself to the outside world. This means that when you're preparing for quarantine, you're trying to store enough supplies to keep you going for as long as you'll need to stay inside your house along with all of the things that you'll need to implement your quarantine procedures. Most of the items that you'll need for a quarantine are similar to a shelter in place kit. If you've already built one, then the extra items that you need are going to be pretty minimal. Quarantine kit inventory:
Additional items to add if your situation requires them:
Don't forget to have enough shampoo, deodorant, toilet paper, toothpaste and other items that you use throughout the course of your day. Over the Counter MedicationThere are a ton of over the counter (OTC) medications that may help boost your immune system so you don't get sick and make your life a lot less miserable if you do get sick. The top immune system boosting OTC medications are Emergen-C and Airborne. They're both very similar and come in drink mix, chewable tablets, and gummy forms. They basically take all of the things that are known to increase the efficiency of your immune system and package them into one place so you don't need to grab each ingredient individually. Using one of these two products is pretty much a necessity in my mind. Keeping your immune system powered up is really important, especially if you're already immune system compromised or you do things that lower your immune system (like drinking heavily or smoking cigarettes). There are two different ways to go about treating a cough with OTC meds. You can either use a cough suppressant (usually has the active ingredient dextromethorphan) or by using an expectorant (guaifenesin). Cough suppressants may seem like the way to go because they keep you from coughing and can soothe your throat and give you some relief from a chest cold and infection symptoms. Expectorants are usually the way to go in my opinion. They thin the mucus in your and allow you to get it out of your body. It may be miserable to cough non-stop, but you're better off getting the mucus out of your body. Pain relievers are readily available OTC. I'd suggest stocking up on either Tylenol or an NSAID of some kind because they both help with aches and pains and can lower a fever. Food Items for QuarantineThe types of food that you should store for a quarantine should be relatively shelf-stable and not prone to spoiling or going bad quickly. If you don't cook on a regular basis then you should really look over the things that you have in the pantry and make sure that you have the things required to make simple baked goods. Cooking will also help keep you occupied and distract you from the fact that you're stuck in the house. Food items to stock for quarantine:
Power should still be up (at least for most of the day) while you're quarantined, so you can still rely on your fridge and freezer to keep foods fresh. On top of buying frozen meals from the store, there are also a ton of foods that freeze well and will keep through a prolonged quarantine. Food that freezes well:
Water for QuarantineYou should already be storing water as far as I'm concerned but, water in quarantine isn't likely to get turned off. You probably don't have to go crazy with the amount of water that you store if you're not already doing it as part of your normal preps. Even though your water will most likely be fine to drink, I still suggest picking up a few cases of water for each person in your family on the off chance that something really crazy happens. Quarantine ProceduresThe exact procedures that you take to quarantine yourself in your home aren't very difficult. They mostly have to do with the way that you sanitize things throughout the day and the ways that you prevent your exposure to other people. There's just no need to try to seal your whole home from outside air or anything crazy like that! Most diseases that would cause a quarantine are spread through contact with infected people, by inhaling respiratory droplets from coughing or sneezing and touching surfaces that have been infected and then touching your eyes, nose or mouth. This means that almost any disease will need you to be in close proximity to an infected person or to touch a surface that infected and then transfer it to yourself. The disease isn't going to be climbing through the crack under your door. Daily ActivitiesThe primary thing that will change with quarantine is your day to day activity. Just about everything is going to have to change! Only leave your home to get emergency medical care. This is the basic idea of quarantine, but it needs to be said. Wash your hands often and whenever you do anything that may get them contaminated like going to the bathroom. Wah your hands before touching your face, eyes or mouth. This is the BEST way to keep yourself healthy. Effective hand washing is a deliberate action! You should be thinking about cleaning your hands and making sure that you scrub all areas of your hands. Don't just get them wet and smear some soap on them. That's not enough!
Using hand sanitizer is okay but it's not as effective as washing your hands. If you have any kind of visible bodily fluids or other dirt on your hands then you need to wash them with soap or water. Using bleach to disinfect hard surfaces is a great way to keep them free of diseases. The CDC recommends using 1 cup of bleach to 5 gallons of water. Wash the area with soap and water, then clean the surface with the bleach mixture and allow it to air dry. If the surface is rough then you should scrub it with a hard-bristled brush and let it air dry. Other things to do as you go about your day:
Everything is about preventing the spread of any disease as you go about your day. Dealing with Sick Family MembersDealing with sick family members is going to be one of the most difficult parts of any kind of significant outbreak. The key is going to be to treat them as best as you can while not contracting the disease yourself. When you first decide to quarantine in your home, you should set up an isolation room if you can. An extra bedroom is a great place for this. The isolation room is going to be where a sick member of your family goes until they're past the point of being contagious. When you're dealing with sick family members they should wear a surgical mask and you should wear an N95 mask and goggles or a face shield. Also, stay at least 6 feet away from them unless you have to get closer. If you need to come in contact with any surfaces that have their bodily fluids on them then you should wear rubber gloves. After you leave the room, throw away disposable masks and gloves. Do not reuse them. If you're using reusable protective gear, then you need to sanitize them according to the manufacturer's suggestion. If you don't have guidance, then use bleach to sanitize them. Remove protective gear in this order:
Sick family members should also be kept away from animals. There's very little chance that the disease will spread to your pets, but it's a possibility. Pets are also much more difficult to sanitize and control. Imagine your dog running all over the house after jumping on a sick family member. How could you possibly be sure that the disease wasn't spread everywhere? Making an Isolation RoomAn isolation room is where you will place any sick family members until they're better. The idea is to keep them separated from the rest of the family so no one else gets sick. If you can also have a dedicated bathroom and shower for them then that's even better. The sick family member should do as much as they can to not spread the disease to the surfaces of the room even though they'll be in your isolation room. This means constantly cleaning their hands, sanitizing surfaces daily with a bleach solution, etc. the same way that everyone else is doing in the rest of the house. There aren't a lot of steps that need to be taken to prepare the room, but I would do the following before anyone was sick:
Interacting with Outside PeopleDon't open the door for anyone! Unless the police are at your front door and threatening to kick it in, keep your door closed and don't interact with anyone that comes to your door. You can speak to them through the door, or even better, talk to them through a smart doorbell like the Ring. It's times like these that I'm happy that I installed one about a year ago. Breaking Quarantine and Coming OutIt's difficult to know exactly when it's okay to drop your quarantine and join the rest of the world again. If there is an all-clear given by authorities, it's probably okay to assume that it's okay. Otherwise, you'll need to use your best judgment based on the life cycle of the disease as you know it. Things to consider when determining when to break quarantine:
No matter what, I wouldn't be the first one out the door running to Walmart. Plan on an extra day or two in the house after most other people have started going out again! ConclusionIf you're forced to self-quarantine in your home, it's going to be stressful and you're most likely going to be worrying about all kinds of things. By preparing ahead of time, at least you don't need to worry about fighting the rush at the stores for food, water, and other supplies! Hopefully, this article helps you understand what's needed in the event that you do have to quarantine in your house and makes things a little easier for you and your family. Good luck out there! The article Step-by-Step: How to Prepare for Quarantine (with Cheat-Sheet) was first published to: ready lifestyle via Blogger Step-by-Step: How to Prepare for Quarantine (with Cheat-Sheet)
0 Comments
Bug Out TentsBug out tents aren't on everyone's list of things that you need in a bug out bag. Why is that? It seems like having a tent in your bug out bag would be a good idea, but is it? A bug out tent is usually a small one-person tent that is lightweight and can be carried inside your bug out bag to give you shelter while you're bugging out. They can also be a tent that you can set up once you get to your bug out location to act as shelter or an expanded living area. Should you consider buying a bug out tent? Keep reading to find out. [/wc_toggle] [wc_box color="inverse" text_align="left" margin_top="" margin_bottom="" class=""] Thanks for supporting Ready Lifestyle! We participate in the Amazon associates program and other affiliate programs. We earn a small commission on qualifying orders at no expense to you. Why Would You Want a Bug Out TentIn my mind, there are two reasons that you'd want to have a bug out tent. One is straight forward and the other may be overlooked by most people. The first reason to have a bug out tent is pretty obvious. You could be forced to bug out during a time of the year where you need to protect yourself from the environment. During seasons with extremes like cold temperatures or frequent rainy weather, it makes sense to have a bug out tent available. The second reason to have a tent is as an addition to your bug out location. You can use it as shelter once you get there or as an extension of your living area. [wc_box color="primary" text_align="left" margin_top="" margin_bottom="" class=""] Tents follow all of the basic shelter building principals that makeshift shelters do. Make sure that you understand them! [/wc_box] Do you need a bug out tent?If you live in an area that experiences very cold weather or long rainy seasons then I'd suggest adding a tent to your bug out bag. I usually don't recommend a tent because you should really be moving to your bug out location pretty quickly and building a tent just adds weight to your bug out bag in most situations and really isn't needed. Another reason to have a bug out tent is if you plan to bug out to an area that doesn't have any pre-build shelter or if you're not really sure where you may end up bugging out to. I also think a good use of a bug out tent is to add living area to your bug out location. In this scenario, you would take a pop-up carport or gazebo to supplement a small permanent structure like a hunting or fishing cabin. You can pack this larger tent in your car or truck and use it as an area to set up an outside cooking or eating area. This lets you use the permanent structure for more important things like sleeping areas. What to Look for in a Bug Out TentThere are certain things that make a tent better for bugging out over other tents. Price, weight, size, color, material, and its level of water resistance are all important. PricePrice is important if you're on a budget. The good thing is there are usually plenty of products that function well at lower price points, and tents are no different. WeightModern tents, made with modern materials actually weigh very little compared to how large they are. I would try to keep the weight down as much as possible without losing a lot of functionality from the tent. Keep it under 3 pounds if you can. If you go for something like an emergency shelter then you can get the weight down to about 1/2 lb, but these tents aren't great for keeping the elements out. I would rather just not bring a tent in most circumstances. If you plan on packing a larger tent in a vehicle then the weight doesn't really matter much. Just make sure it's light enough that you can get it out of the car easily and set it up with one or two people. SizeThe biggest drawback of bringing a tent with you is the amount of space that it takes up in a bug out bag. I'm a fan of tents that don't need poles and can be set up with sticks or tied to trees. This style of tent really cuts down on the amount of space needed in a backpack and usually are less than a foot long and 6 inches wide when they're packed up! Again, the super small emergency tents seem like they would be great because of their small size, but I don't really find them useful in a scenario where I'm planning to use a tent. For tents that are going to go into a car, you don't need to worry too much about the size, but there is a point that it can be too large. It the tent you're planning on taking start to displace things like food and water from your loadout you're probably going to want to look for something a little smaller if you can. ColorColor is important because you want to be able to blend into the environment if you need to. Usually, this won't be a problem, but there are definitely occasions where I could see not wanting to be seen while you're bugging out. Choose colors that are close to the environment you're most likely to bug out in. If you can't find an exact match, I wouldn't worry about it. If you really need to blend in then you can use brush and vegetation from the surrounding area to help your tent blend in. If there isn't much brush and other things to help you blend in, then your tent is probably going to stick out like a sore thumb no matter what color it is. MaterialPretty much any tent that you're going to get these days is going to be made of nylon or some other synthetic material. These materials are light and help prevent water from penetrating them. The main way that material affects the tent is through durability. Look for strong tents that aren't going to tear easily but are still light enough to make carrying them easy. Water ResistanceAny tent that you get should be mostly waterproof. You can seal a new tent if you're worried about water getting in or if you plan on using it in extremely wet weather. Tents that have an additional rainfly are going to be heavier, but they usually stay dry for longer. If you plan on bugging out in a rainy season, go for a tent with a rainfly and don't worry about the minor added weight. Bug Out Shelters That Aren't TentsTents aren't the only type of shelter that makes sense for bugging out. There are actually quite a few options that may be even better than tents. TarpsTarps are a multi-use piece of equipment that can fill a whole range of roles. One of those roles is as a makeshift shelter. If you know that you're going to need a tent, then buy a tent. If you're not sure, or you only need a tent for a couple of months out of the year, then a good quality tarp could make sense. Tarps are easy to use to make into a bunch of different shelters. Make sure that you pack some 550 cord and tent stakes to make building a shelter a little easier on you. HammocksHammocks don't usually come to mind right away when we're thinking about shelters but they actually do several things that make them great. Hammocks naturally lift you off of the ground which prevents you from losing a lot of body heat into the ground. You still have the wind that can suck body heat away but if you put a decent underquilt under the hammock you'll stop that from happening. You can also set up a tart over the top of your hammock to prevent rain or snow from getting you wet while you sleep. Just make sure that it covers enough of your hammock so it completely blocks the rain and doesn't drain onto you as the rain runs off. The big drawback of hammocks is that you need to be able to attach both sides to a tree, pole, building, car or something else when you set them up. If you're traveling across flat land you could have a hard time setting up a hammock. Bivy SacksBivy sacks are another great option if you're trying to keep your gear lightweight and compact. They're basically a waterproof shell that you can slide your sleeping bag into. I prefer to use bivy sacks that have added headroom and zip completely closed to protect you from the elements. Look for a GoreTex bivy sack that zips completely closed for the best results. Best Bug Out TentsThese two tents are some of my favorites in the ultralight backpacking tent realm that won't break the bank. Be sure to wear warm clothing and/or pack a sleeping bag if you need to stay warm. These tents are great for keeping you out of the wind and keeping the rain off of you, but they're not going to arm enough in low temperatures. River Country Products Trekker Tent 1.2The Trekker Tent 1.2 is an ultralight one-person tent that doesn't come with any poles. It's designed to be held up with trekking poles so it keeps the weight down. The good thing is that any sturdy branch can also hold it up. The .2 version has been redesigned to better seal the seams and the tent as a whole so it's more resistant to the elements. Get the .2 version since it's basically the same price and provides more protection.
River Country Products Trekker Tent 2.2The Trekker Tent 2.2 is super compact and designed for 2 people. Just like the 1.2 it's meant to be held up with trekking poles, but you can use just about anything to keep it propped up. Get the .2 version of the tent because they made it more resistant to water by beefing up the seams and sealing the whole thing better.
Larger TentsFor larger tents, I like simple, easy to set up options that don't take up a lot of room when they're packed up. Most large 10' x 10' or larger tents are between 50 and 100 lbs. so having a carrying case with wheels is another plus. What to look for in larger tents:
ConclusionBug out tents are great if you're going to be bugging out in inclement weather or if you need to set up some kind of shelter at your bug out location. They're also a necessity if you don't have a predetermined bug out location selected. Look for small, compact and lightweight tents for your bug out bag itself, and sturdy, easy to assemble tents to add to your bug out vehicle. Bug Out Tents: Are They Right for You? was first published on: Ready Lifestyle via Blogger Bug Out Tents: Are They Right for You? New to Prepping?If you're new to prepping, then you're probably getting barraged with a ton of info from all different sources. It can get overwhelming really quickly! I'm going to try to make it a little easier on you by laying out the things that I think are the most important for you to do first and providing some useful information and links to articles that answer questions that usually pop up when you're just getting started with prepping and preparedness. [wc_toggle title="Table of Contents" padding="" border_width="" class="" layout="box"] [/wc_toggle] [wc_box color="inverse" text_align="left" margin_top="" margin_bottom="" class=""] Thanks for supporting Ready Lifestyle! We participate in the Amazon associates program and other affiliate programs. We earn a small commission on qualifying orders at no expense to you. Is it too Late to Start Prepping?It's never too late to start prepping! Don't get discouraged if you're just getting started. There's always going to be some kind of event going on in the world that could cause us to have to rely on the things that we've prepared, and it's always going to seem like that event is too close to get ready for it. The good thing is nothing bad is probably going to happen right now! The bad thing is eventually something bad is going to happen... We all started somewhere. If there's something specific driving you to get into prepping right now, then you're in the right place. Get started, be ready for anything, and hope for the best. What Should You Do First?The first thing that you need to do is do something! Everything that you do gets you closer to being prepared. Don't get caught up reading article after article for weeks on end and never taking any action. Being prepared is all about moving forward and taking action! You'll probably never reach a point where you'll feel like you have enough water, food, medical supplies, etc. no matter how long you stay on the prepping path so make progress and know that you're better off now than you were the day before. Start Small and Work From ThereWater and food are always going to be the most important thing you need. If you're ever wondering what you should get next to further your preps, you can't go wrong with water and food. If you don't have any water or food stored then your first goal should be to get 1 week of each stored for each member of your family. You should aim to have 1 gallon of water and 2,000 calories stored per day. [wc_box color="primary" text_align="left" margin_top="" margin_bottom="" class=""] The only time that I'd recommend not starting by storing food and water first is if you have medication that you rely on for survival. If you fall into that category then I'd start by working to get a surplus of medication if you can. [/wc_box] After you reach the one-week goal, you should continue to store food and water until you have a full month of supplies for each member of your family. At this point, you'll be far more prepared than most families in America! I highly suggest that you don't bother buying any other preparedness items until you have a full month of supplies for everyone in your home. If you have plenty of money to spend then just buy what's needed to get you to a month. If you're strapped for cash you can gradually grow to that point. Either way, having a basic level of food and water is the most important part of prepping. Your initial prepping goals:
Water StorageWater should be the first thing that you focus on if there aren't any easily accessible natural water sources close to where you live. Even if you have tons of water sources around your home, you should still try to get to the point where you have at least a full month's supply of drinking water stored. The cheapest way to get started is by refilling empty soda and juice bottles. Any bottle that's strong and has a good screw on top will work as long as you can clean it out well. Stay away from things like milk jugs since they're hard to get completely clean, don't have lids that seal well and can crack if they're dropped and as they age. The easiest way to get a decent amount of water stored quickly is to simply buy cases of bottled water. I prefer to buy name brand water because the bottles are usually stronger and have more secure lids. If you just buy the cheapest water you can find, you should still be fine. I just like the stronger bottles because it just seems like they're less likely to break and leak. The best way to store water is in larger containers as long as you have space. Read our home water storage article in the recommended reading section to learn more. How much water do you need to store?FEMA recommends that you have at least three days of water stored per person. I just don't believe that it's enough. Flooding, earthquakes and many other disasters can easily interrupt home water services for weeks or more! That's why I suggest working toward at least one month if you can. Recommended Reading:
Food StorageStoring food should be your other priority when you first start prepping. We can survive for weeks without food, but it's not something that anyone wants to do! The cheapest way to start storing food is to buy rice, beans, corn, wheat and other staple foods that can be bought in large quantities and last for a long time. Check out our Cheap Survival Food article in the recommended reading below. The easiest way to get all of the food storage you could ever want is to simply purchase freeze-dried food and have it shipped straight to your door. This is the most expensive way to get it done, but it's definitely easy. The best way to store food is by having a wide range of freeze-dried, canned, and long shelf life staple foods stored. How much food do you need to store?FEMA says the same thing about food that they do about water, have three days of food for everyone in the house. I also say the same thing about food as I do about water, start at one month and store more after that as you can. Recommended Reading:
Bugging InBugging in is when a disaster strikes and you stay in your home and stay there throughout the entire disaster. Bugging in keeps you in a safe area that has all of your preps and your family in one place. This should be your first reaction to a disaster. If you live in a place that you plan to leave as soon as some kind of disaster is headed your way, then I would suggest that you start looking for a new place to live. It may not be very practical for you right now, but you shouldn't live in a place that's too dangerous to stay in during a disaster. Recommended Reading: Bugging OutBugging out is when you grab emergency supplies and leave your home because it's too dangerous to stay there or it's going to become too dangerous to stay there. Bugging out should be one of the last resort measures that you take. Bugging out should be your last resort because it takes you from a place that you know (and has all of your food and water already in place) and puts you out into the unknown. Natural disasters are one of the main reasons that people bug out. Recommended Reading: Knowledge is PowerYou can never have enough knowledge! There is so much information available out there for free that it doesn't make sense to not learn every single day. My only warning is that you need to take action and not get stuck reading more and more articles on the internet! As long as you're putting what you're reading into action, you're always going to be one step ahead of a majority of the population. The first things you should learn as a new prepper:
Recommended Reading:
What Can Cause an SHTF?An SHTF is a disaster that sends our day to day lives into disarray. It doesn't need to be a complete break down of society. It can be everything from a personal event, like losing your job, to a full-blown financial collapse or even an invasion from a foreign army. Natural and man-made disasters can all lead to SHTF. Read our SHTF article in the recommended reading to learn more. Recommended Reading: Emergency KitsI don't suggest building a bunch of emergency kits and buying a lot of gear before you have a basic level of food and water stored for your family. If you have the money to trow at prepping then feel free to buy gear and emergency kits at the same time as you're putting together food and water storage. If not, then focus on food and water first! Bug Out BagsBug out bags are a self-contained kit that has everything you need in case you have to just grab one bag and hit the road. They're talked about all over the place, and some people get distracted by building a bug out bag when they first get started prepping. Again, don't worry about it until you have food and water stored. Bug out bags are important and should be one of the first things you put together once you start buying gear, but they're just not important to start out with. Get Home BagsA get home bag is a bag that's designed to get you home from where ever you happen to be. Normally this place is work since you probably spend much of your day there when you're not home. Recommended Reading: Weapons for PreppersYou should have a firearm of some kind to protect you and your family if you're legally allowed to. I also suggest carrying a pistol with you every day. You never know when you may need it! Outside of a home defense weapon and a carry pistol, I suggest having either an AR-15 or AK-47 style rifle for each adult in the family. Don't go crazy buying weapons unless it's a hobby because collecting weapons isn't prepping. Recommended Reading: Body Armor for PreppersBody armor is one of the last things that you should be thinking about if you're just getting into prepping. There are definitely reasons to get body armor as a prepper, but it's nothing that you need to worry about before you have all of your other bases covered. Recommended Reading: ConclusionJust getting into prepping can be confusing and a little intimidating, but it doesn't have to be. Start with the most important things, food and water, and then move on to other things when you have those in place. Get started now and you'll be way ahead of most people. New to Prepping? Start Here! was originally seen on: Ready Lifestyle Blog via Blogger New to Prepping? Start Here! Wound Healing PlantsThere may come a time in anyone's life where you become wounded but do not have immediate access to a hospital or some sort of medical attention. Perhaps you are out hiking and the trail back is long and arduous, maybe a remote rock climbing expedition has gone horribly wrong and help is further away than you would like. Or, when the SHTF and you are injured during the event. This can be an intimidating situation if you are unprepared but there are ways in which you can help yourself. One of these ways is by using what nature has to offer and taking advantage of the many plants which are able to help in the initial treatment of wounds. [/wc_toggle] [wc_box color="inverse" text_align="left" margin_top="" margin_bottom="" class=""] Thanks for supporting Ready Lifestyle! We participate in the Amazon associates program and other affiliate programs. We earn a small commission on qualifying orders at no expense to you. Top 5 Wound Healing PlantsIn this article, we are going to be taking a closer look at the things that mother nature has provided for us and dive a little deeper into which plants are great in a first aid situation when SHTF. All of the plants can be found growing naturally all over the United States and so you can be sure that you will have easy access to some if not all of them in an emergency. PlantainIn this instance, we are not referring to the species of banana but to a type of weed that can be found all over the country. The plant is easily identified by its veins which run up the back part of the leaf. These veins run in a parallel pattern and always come in odd numbers. For open wounds, you can simply apply the leaf in order to help draw out any infection. Plantain has many properties that can assist in the treatment of wounds, especially in an emergency situation. It is not only anti-inflammatory but also anti-fungal, anti-bacterial and a powerful antioxidant, if this wasn't enough it also helps in the prevention of ulcer formation. YarrowThis plant has been used for its medicinal properties for thousands of years and there is a good reason for this. One of its superpowers is that it is incredibly effective in the treatment of burns, this includes sunburn which may be common in a survival situation. It is also effective when trying to stop bleeding from an open wound and acts as an anti-bacterial. You can simply chew the leaves and then apply the mixture of leaf and saliva to the wound in order to reap the benefits. To identify yarrow you should look for a plant that has a fern-like appearance with many leaves and small white flowers. It is worth noting that in some cases, the flowers of the yarrow plant may come in a pale pink color. CalendulaHaving a high similarity to the marigold, calendula is another plant that is very useful in the treatment of wounds. The plant is great as an anti-bacterial and is also well known for increasing blood flow, this is perfect when it comes to quickly healing a wound. This plant has also been praised for its pain-relieving properties when applied directly to the area. You will easily be able to recognize the calendula plant due to its long, straight and colored petals, these petals will usually be either yellow, orange, pink or white. In the center of the relatively flat flower, there is a single dot that is very distinct and will give away the species easily. GoldenrodThis yellow flowering plant has been noted for its anti-inflammatory properties which is of course, highly useful when it comes to the treatment of wounds. The plant contains saponin which is a chemical that turns into a soap-like product that is used to treat a wound and for other medicinal purposes. Goldenrod is also known for being very good at assisting with bleeding. Goldenrod has also been noted to be very effective for pain relief. Interestingly, goldenrod was used by Native American tribes for a variety of different medicinal purposes including hair loss but also as a topical treatment in wound care. The plant can be identified by its smooth leaves that have jagged edges. The plant can be confused with plants that are poisonous and one surefire way to determine whether what you are seeing is in fact goldenrod is to look at whether the stems branch out if they do it is not goldenrod, the stems of this plant stay in a straight formation. Aloe VeraIn warmer parts of the USA such as Texas, Florida, and California, you will find the amazing aloe vera plant growing. This plant is famed for being highly useful in a huge variety of ways. The clear gel which can be found inside the leaves is ideal for applying to a burn as it is super soothing. The plant also contains chemicals that promote collagen production, this, in turn, speeds up the healing process for a wound. It is also known to be a plant that promotes the regeneration of cells which adds to the healing process. Once the aloe gel has been applied, if you can, you should dress the wound with a bandage in order to prevent infection. On top of all of this, aloe vera is also an excellent anti-inflammatory. In order to successfully identify aloe vera, you will need to look out for a succulent plant with thick, spiky green leaves. The plant is known to grow with its leaves in a spiral formation. ConclusionIf you ever find yourself in a situation where you or someone you are with get injured whilst out in nature or in an emergency situation, there is no need to panic. There are plants that have real medicinal value growing all over the U.S. You may not even be aware of the fact that you might have medical plants growing in your own garden. In an emergency situation or when the shit hits the fan where you do not have access to a doctor or a hospital, you may have to treat a minor wound or injury in a more natural way. By being able to identify the plants which can assist in would care, you can be confident that you will be successfully able to take on any situation that may arise. The post 5 Wound Healing Plants to Help When SHTF is available on: ready lifestyle via Blogger 5 Wound Healing Plants to Help When SHTF Free Survival GearA lot of people are looking for free survival gear. You can take advantage of these offers as long as you shop around a little. [wc_box color="primary" text_align="left" margin_top="" margin_bottom="" class=""] I did the homework so you don't have to! Look under each offer to see if it's worth it or not. [/wc_box] You can find free survival gear from quite a few companies that make more expensive gear. One of the latest marketing techniques that survival companies are using is to give away a free item with the hopes that the person who takes advantage of the free offer will become a long-term customer. Most of the offers below are structured in a similar way. The price you pay covers the shipping for a piece of gear or training and the company hopes that you'll be impressed enough to continue to buy from them. Some of these offers are decent, and some of them just aren't worth it. I'll tell you which is which. [wc_toggle title="Table of Contents" padding="" border_width="" class="" layout="box"] [/wc_toggle] [wc_box color="primary" text_align="left" margin_top="" margin_bottom="" class=""] Normally the company asks that the customer pays for the shipping costs. These usually run somewhere between $3 and $6 and basically covers the actual cost of the item. [/wc_box] I'll keep adding offers as I find them and get a chance to test them out. Free Survival Kits
Paracord Survival Kit - Another "survival grenade". 10 items wrapped in 9 feet of paracord. Comes with 16 free survival PDFs that aren't mentioned anywhere but you get e-mailed the link in the order confirmation e-mail. You can get something similar on Amazon for the same price but it doesn't come with the PDFs.
Ape Survival Survival Grenade - Typical "survival grenade". Contains 15 items. The best use for these is to simply clip it on a bag until you need it. Comes with 3 free survival PDFs that aren't mentioned anywhere but you get e-mailed the link in the order confirmation e-mail. You can get something similar on Amazon for the same price but it doesn't come with the PDFs.
Free Survival Tools
Free Karambit - This karambit is around 7.5" in overall length and would be a decent, cheap defensive knife.
USMC Neck Knife - Free neck knife with a partially serrated blade in the style of the beloved K-Bar.
Strikepen - LED flashlight, pen, tungsten striker point, and two interchangeable tools.
Survival Card Multi-Tool - Typical survival card. It contains 11 tools. It also comes with 2 free survival e-books.
Survival Business Card - Typical survival card. Contains 11 tools. Comes with 3 free survival PDFs that aren't mentioned anywhere but you get e-mailed the link in the order confirmation e-mail. You can get something similar on Amazon for the same price but it doesn't come with the PDFs.
Credit Card Knife - This is an interesting little knife that folds up and hides away in a wallet. It isn't practical for everyday use but it could come through in a pinch.
Rescuecard - One of the better-looking survival cards. It contains 14 tools.
Knife Card - Another folding concealable credit card knife. This is pretty much the same thing as the one above, but it's half the price.
Free Flashlights/Lanterns
Hybeam Tactical Flashlight - Another LED flashlight. Aluminum body with a beveled edge for striking. Comes with a lanyard. Less expensive than any of the equivalent items over on Amazon.
Q5 TacLite - Uses a new Q5 CREE LED emitter to throw light up to 1100 feet. It uses a single AA battery, has an aluminum body and pocket clip. Great as a backup EDC flashlight or to put in the car.
J5 Tactical Flashlight - LED flashlight outputs 250 lumens with aluminum body and pocket clip. Another great back up light for the house or the car. Less expensive than any of the equivalent items over on Amazon.
Hybeam Micro Tactical Flashlight - Very small, water-resistant, and easily slips into the pocket. Aluminum body with a pocket clip. Less expensive than any of the equivalent items over on Amazon.
Free Emergency Fire Starters
Everstrkye Match - Contains a ferro rod, wick, and fuel for more than 15,000 strikes. Limit 10 per household.
FireKable Paracord Bracelet - 80 feet of usable cordage with a ferro rod.
Everstryke Waterproof Lighter - Usable for 15,000 strikes. Sealed to prevent leakage of fuel.
Optic Fire Starter - A simple, yet often overlooked fire starter. Focuses the sun to light tinder quickly.
Free Preparedness Books, Videos, and TrainingMiscellaneous Free Survival Items
Wasn't in stock last time I tried to review it.
Valois SSD-90 Tactical Knife Belt - A web belt with a concealed knife in the buckle. Adjustable from 24 to 52 inches. Wasn't in stock last time I tried to review it.
Emergency Survival Blanket - Typical mylar blanket. Good for throwing in a bug out bag, car, boat or backpack.
Free iPac T-Shirt - Free iPac t-shirt with a Glock pistol on the front.
Free American Patriot T-Shirt - "American Patriot" T-shirt.
Armor.1 RFID Blocker - 5 pack of RFID blockers to prevent scanning of credit cards and chipped ID cards.
ConclusionFree survival gear isn't actually free, but that doesn't mean that all of it is worthless. There are a lot of offers out there that I wouldn't suggest (it doesn't necessarily mean they're bad) but there are a few that actually make sense when you take a good look at them! The previous article Free Survival Gear – Is It a Scam? We Tell You the Truth! is available on: Ready Lifestyle Prepping Blog via Blogger Free Survival Gear – Is It a Scam? We Tell You the Truth! Office Survival KitMost of us spend the majority of our week at work. That means that when a disaster strikes, there's a good chance that we'll be in the office when it happens. This is where an office survival kit comes in. This isn't a cutesy article about how you need gum in your kit in case you have onions at lunch. This a serious look at the things that can help you in a serious situation! An office survival kit should include everything that you may need in the event of a disaster. Food, water and medical items are needed as well as protective glasses and a face mask, flashlights, an emergency radio, knife or multi-tool, a prybar, emergency whistle and leather gloves. Let's get dig deeper into why you need each of these items in your office survival kit. Office Survival KitsI was surprised when I went looking for office survival kits...there's basically no good information out there on the topic! We'll look at this logically and come up with a solid survival kit that will work for just about anyone. As I describe things, just keep in mind that everyone's situation is different so add or remove items as you see fit. Who Needs an Office Survival KitAnyone that works away from home should have an office survival kit. That goes for someone that works in a factory, mailroom, or any other building. If you work out of a truck, I would suggest just having a get home bag with you at all times. You can put it in your desk, under your desk, in a locker or anywhere else. I know a lot of people are embarrassed to have any kind of emergency kits. You should work to get over that because it's not you with the problem. Anyone that looks down on you for being prepared is the one with the issue! If you're still working through some kind of embarrassment or just don't want anyone to know that you have a survival kit in your office, just bring it in early before everyone comes in or bring it in after everyone has left for the night. What Should be in Your KitThis kit is basically designed for two scenarios. The first scenario is being stuck in the office for some reason where you're better off staying inside. Extreme weather and similar disasters could easily cause this depending on where you live. This could also transition into the second scenario. The second scenario involves being trapped in the office and having to escape or survive until rescuers can get to you. This scenario is much less likely, but also much worse than the first scenario. When you're building this kit, keep in mind that it's for you! If you feel strongly about preparing the entire office for a disaster, then I would bring it up with your boss or office manager. There are all kinds of pre-made kits out there that will work as a basic survival kit for an office of people (like this one from More Prepared) but they're pretty bare bones. I'd beef them up if I was making a purchase for my office. Water - Water is at the top of almost any emergency kit loadout and this one is no different. I suggest just putting a case of water under your desk and calling it good. Drink four 16.9 oz bottles of water per day to stay hydrated while you're not overly active. This one case of water will last you 6 days of being trapped in the office. The minimum amount of water that you should drink for survival is about 1 liter (about 34 oz.) per day. It's not ideal, but it keeps your organs functioning and you should only experience minor dehydration symptoms if you're sitting relatively still in an office waiting to be rescued or waiting out a storm. You should shoot for drinking at least 2 liters per day to stay hydrated. The chart below shows how much water you should be drinking per day based on body weight. How Much Water Should You Consume Based on Body Weight
Food - Food seems like it should really important in a survival kit, but it doesn't even come close to being as important as water. Since we have 6 days of water, let's get 6 days of survival food bars (this two pack of S.O.S. survival bars will cover it). I'd also add a few Power Bars or Clif Bars so you have extra calories and can eat something other than emergency rations. You can go for weeks without food! If you're used to eating a lot every day, you're going to feel like you're starving with just the S.O.S. bars but I promise you're not. First Aid Kit - Most offices have some kind of centrally located medical kit that has bandaids and some other things to treat minor cuts and scrapes. For day to day work and to meet minimum legal requirements, these are fine. They usually don't cut it for a real emergency! For a first aid kit, I'm going to suggest the same thing I always do; the Adventure Medical .5 Kit, the Adventure Medical Trauma Pak, and the SWAT-T Tourniquet. These three items give you the basics to treat everything from scrapes to major trauma. You hopefully won't need them, but they're there in case you do. Glasses/Goggles - A cheap pair of clear goggles or glasses can help keep your eyes safe if something happens that causes a lot of particulates like dust, dirt, dry, etc. to get thrown in the air.
N95 Face Mask - N95 face masks are also useful when there's a lot of stuff floating in the air. If part of your building collapses, you don't want to be breathing in all the various toxins that may be in the air. Leather Gloves - Leather gloves are there to protect your hands in case you have to break glass, dig out from a collapsed wall or section of the building. Make sure they're sturdy and fit well. There aren't many requirements beyond that. Flashlight - Just about any kind of disaster can cause the building to lose power. Any sturdy flashlight will work, it doesn't need to be some high speed $100 combat flashlight. Throw in extra batteries and you're good to go. Emergency Radio - Look for a NOAA capable radio that runs off of batteries and can be charged by a hand crank, solar and USB. This radio is a good choice since it functions as a battery bank as well and can charge your cell phone. A NOAA lets you monitor the National Weather Service's emergency broadcast system which should be broadcasting about any major disaster in the area. They provide updates and changes in situations that you may not know about if you're stuck in the office. Knife or Multi-tool - I would go with a name brand multi-tool like a Gerber or Leatherman. They're more expensive, but they also don't break the first time you go to use them.
Prybar - A prybar may seem crazy when you first think about it. Why do you need a prybar in an office survival kit? If things have really gone bad, something simple like this wonder bar could mean the difference between life and death! You can use it to pry open doors and windows to let you get out of the office. A larger prybar is usually better. You'll have to make a decision about how big you want to go but 15" is a good all-around size. You can also dig with it or just bang it on the walls to signal to rescuers that there's someone alive. Emergency Whistle - The emergency whistle is there as another way to signal to rescuers. It doesn't need to be anything special, it just needs to be loud and not break when you need it most. Blankets/Sleeping Bag - A blanket or small sleeping bag can help keep you warm and comfortable if you're trapped in the office during the winter and the heating system fails. Comfortable Shoes - Most people working in offices aren't wearing the most comfortable shoes out there. Dress shoes and heels just don't have the grip or flexibility that you need in an emergency. Put a pair of old sneakers or boots in your kit. Don't go out and buy new shoes! This will save you money and used shoes are already broken in so they won't cause blisters or hotspots on your feet. Backpack/Gym Bag - You don't have to buy a backpack or other bag to put everything in. Even a simple cardboard box will work fine if that's what you choose to go with. I like a backpack because it lets you grab it and go if you need to move from one room to another or go to a different part of the building. Make sure everything other than the case of water fits in the backpack and put several bottles of water in the backpack. If you have to move to another area, put the backpack on and carry the rest of the case of water with you if you can. Other ConsiderationsIf you're reading this, then you're probably the most prepared person in your office! It may fall on you to bring up questions about basic preparedness with your managers and you could easily find yourself in a leadership role during an actual disaster. Your office should have a designated shelter in place room. This is usually a room that has no windows and is on the interior of the building. If there isn't a plan in place, you can get the basics from osha.gov and work with your management to create one. A disaster that strikes an office could be preceded with a shelter in place order. You should know the difference between shelter in place and lockdown. They're two different things and require different reactions. Know where the fire extinguishers and emergency shut-offs are located in your building. This seems basic but I bet a lot of us walk right past fire extinguishers every day and don't even realize they're there. If you work in a building that stores, produces or deal with chemicals, you should know where the SDS (Safety Data Sheets) are for the chemicals that are used in your building. If your office is near a building that uses chemicals then you should try to find out what chemicals they use in case of a spill or disaster. You can find the SDS for any chemical by searching for the chemical at SDS Search. Check your kit every quarter to make sure your batteries are still good and nothing has expired. If you find something that doesn't work anymore or any expired items, replace them as soon as you can. You should still have a get home bag in your vehicle. Your office survival kit is designed to keep you going if something happens while you're in your office. If you need to use your get home bag while you're at work, you can pull certain items from it if you need them but they serve two separate purposes. ConclusionThe office survival kit is often overlooked, even in the preparedness community. You probably spend at least 40 hours at work every week. It only makes sense to have some kind of emergency kit where you're spending 1/3 of your day. It doesn't need to be a challenge. Take a few minutes to put together the things that you have around your house to make a kit for your office, then fill in the gaps when you get cash or have more time. It's really that simple! Office Survival Kit – What You Need to Survive a Disaster at Work was first published on: Ready Lifestyle Blog via Blogger Office Survival Kit – What You Need to Survive a Disaster at Work Bug Out BoxesWhat are your plans if you have some time to get ready before you have to bug out? If you're well prepared then you probably have a list of everything that's most important for your survival with the location of each item so you can grab everything and get it loaded into your vehicles. It's great if you're at that point! You're probably well beyond most people when it comes to preparedness, but isn't there some way to be even more prepared? That's where bug out boxes come in. Having as much as you can have prepacked and ready to go will make the frantic time more smooth and greatly decrease the possibility that you'll forget anything. Bugging Out with Bug Out BoxesBugging out should be planned long before you ever have to even think about doing it. This is where bug out boxes shine, but before we get into that, let's look at where bug out boxes should fall in your overall bug out plan. The base of your bug out plan should revolve around your bug out bag. This base level of bugging out is when there is a no-notice disaster that causes you and your family to have to just grab your B.O.B.s and go, no questions asked and not stopping to grab anything else. You may be leaving in a vehicle, or you may be leaving on foot. The next step above your immediate, drop everything and go plan for bugging out should start to involve bug out boxes. If you have an hour to get out of the house, you can get a lot more loaded into your vehicles if your most important items are already loaded into pelican cases or storage totes of some kind. Bug out boxes streamline the whole process and ensure that you're packing the things that you need most. If you have several hours, to a few days notice before you have to leave, then bug out boxes will make it much easier to organize things in your vehicle (or vehicles) as you're loading everything. Bug out boxes are great for everything other than the "get out the door now" style of bug out. What Should be in a Bug Out BoxThe beauty of having preloaded bug out boxes is that you can put anything that you'd like in them as long as you pack them based on the importance of what's in them. For example, food and water should be high on the list while a pop-up carport or air mattresses would be lower in priority. The top priority boxes should include those things that are essential for life. Water, food, shelter, and medical. Water should be in its own container but you should think of it as part of these kits if you need to bring water with you. Everyone's situation is different so the way that I've prioritized things below isn't cut and dry but it should be pretty universal. When it comes down to it, you're smart enough to know what's important for your particular situation. Do what's right for you! 1st priority bug out box items:
2nd priority bug out box items:
3rd priority bug out box items:
Priority Loading of Bug Out VehiclesDetermining what is most important to load into your vehicle is going to depend on your particular situation. I see two different scenarios being the most prominent for people. The first scenario is less desireable but it's probably the most common. In this scenario, you either have a plot of land with no structure on it as your bug out location or you haven't even chosen a bug out location. In this case, you're going to need to bring tents, cooking items, and everything else that you may have wanted to store at a bug out location with a building on in. Because you don't have much, or any, shelter in place at your bug out location in this scenario, you need to prioritize a higher level of shelter. A carport style tent for cooking and living is a great idea in these situations. The second scenario is less common, but it's the best case for bugging out. In this scenario, you have a bug out location that has a home or at least some kind of structure on it. This can be a hunting cabin, a house in a secluded area that you vacation at or just a plot of land with a shed on it. This lets you preposition the supplies you're going to want when you get there and cuts down on the "must-haves" that you need to take when bugging out. If you have most of what you need at your bug out location, you can put yourself even farther ahead by bringing more food and may even be able to start prioritizing more comfort style items. This is where all of us should be striving to get to! As you load your vehicle, you should put the highest priority items in your vehicle first. These are the things that you want to leave in your vehicle at all costs. Your 2nd priority boxes get loaded on top of your 1st priority items so they can be removed if you need to make space for higher priority items or other people. Your 3rd priority items are loaded on top of the 2nd priority for the same reasons. Load each person's bug out bag last! Your bug out bag is the highest priority of all your gear because it can support you all by itself. It gets loaded last so you can grab it and go if you're forced to leave your vehicle for any reason. What are the Best Boxes to Use?The type of boxes that you use is really up to you. I happen to have several Pelican 1560 cases that I use because they're tough, waterproof and have wheels which make getting them around really easy. They're just too expensive for a lot of people and they're heavy even without anything inside of them. The good thing is you can use any kind of plastic stackable totes. Even the cheap ones from Walmart will work fine as long as you don't need to lock them and keep them out of the elements. It really comes down to your budget and personal needs. ConclusionBug out boxes make the perfect companion to your bug out bag and should be a large part of your bug out plan. Having boxes prepacked and ready to go can really ease your mind when everything is going bad. It also helps when you have things pre-prioritized so you know that you have the most important things loaded and haven't missed anything. I definitely think that bug out boxes are important for anyone who doesn't have a specific bug out location. You don't have food, water and shelter in place already so you need to bring all of that stuff with you when you go out the door! Bug Out Boxes – The Bug Out Bag Companion was first published to: https://readylifestyle.com via Blogger Bug Out Boxes – The Bug Out Bag Companion Get Home Bag ListWe each have our own needs and we're all going to have to go through different areas to get home if a disaster strikes. Because of this, there isn't a single list of gear that will work for everyone's get home bag. We'll discuss the minimum gear needed to have a fully functioning get home bag and we'll discuss what to think about before you put other gear on your get home bag list. [wc_toggle title="Table of Contents" padding="" border_width="" class="" layout="box"] The Purpose of a Get Home BagA get home bag honestly doesn't require a whole lot. Everything that you put on your list should help get you from where ever you may be and back to your home when a disaster strikes and you need to walk home. There's a lot of reasons that you could be forced to walk out of an area, this list is just a few. These are some of the things that could cause you to have to use your get home bag:
The good thing is very few of these events are likely to happen without any kind of warning. I would argue that we all need a get home bag in our vehicles or in the offices. Don't leave your survival up to chance! Most of us spend a ton of time away from home every day. This means that if a disaster strikes, we're almost as likely to be out and about or at work as we are to be at home. Normally all that time is usually spent in one or two locations so we can plan out get home bag lists with that location in mind. If you happen to deliver packages, drive a cab or do something else that keeps you moving around during the day, things a little more difficult. If you fall into that group, plan your list as if you have to walk from the farthest distance that you usually travel to. By doing this, you'll have what you need in case something happens when you're out there and you can always dump anything extra that you added if you're closer to home than expected. What Should be on Every Get Home Bag ListThese are the things that must be on a get home bag list:
If this is all that you have in your get home bag, then you're still in good shape. Everything else that we may add to that list is just extra. [wc_box color="primary" text_align="left" margin_top="" margin_bottom="" class=""] You can get our downloadable get home bag list PDF here. [/wc_box] Remember to count your EDC as part of the items that will be part of your get home bag list. If you always have the same things on you when you're at work, it doesn't make sense to add the same things to your get home bag again. Get Home BagThe bag that's going to hold everything should blend in with your environment. For most people, I would suggest getting something that would be at home in an office, a school or a gym. No one is going to give you a second look if you follow that suggestion. You can even get creative and fit everything into a large fanny pack or camera bag. Sling bags, messenger bags, and laptop bags are options as well. With large bags, you need to make sure that you're overloading them and just carrying things that you simply don't need. With smaller bags, make sure that you have everything that you're going to need. Using a bag other than a backpack also comes with some potential limitations. Backpacks have 2 shoulder straps and sometimes a chest strap and a waist strap. When you go with a sling bag or camera bag, you may end up causing yourself unneeded strain and stress because they only have a single strap.
WaterWater is really the most important thing to have on a get home bag list. For the most part, we're planning on walking home within one day so that makes a lot of the other items less vital. Have at least 2 liters of water in your bag and ready to go and a small personal filter to make it easier to get water later on when those 2 liters of water are gone.
FoodFood is a comfort item when you're walking for a day. You'll be hungry when you get home, but there's no danger to your health. Even a couple of days of walking without food isn't going to kill you, but it is going to make you miserable. Pack enough MREs, PowerBars or Clif bars in your bag to keep you comfortable throughout your trip home.
FootwearThe most important thing other than water on your get home bag list is a pair of comfortable shoes. I just use an old pair of hiking boots or sneakers that are broken in and won't cause blisters and undue pain. You're probably going to be walking a lot more than you're used to. Make sure your shoes are comfortable. ShelterA light shelter is a necessity for almost any environment. This means that you should throw a couple space blankets or a poncho on your list. Your shelter is going to include the clothes you're wearing so make sure you take that into consideration. As you get into more and more extreme weather, you may need to pack a sleeping bag and bivvy to stay warm and dry. First Aid KitDon't overlook a first aid kit on your list. Just because you're only going to be on the road for a day or two, doesn't mean that you don't need a first aid kit. There are a lot of things that can lead to an injury during man-made and natural disasters. Make sure that you add any prescription drugs that you need as well.
Other Items to add to Your Get Home Bag ListEverything listed above is pretty much a necessity for a get home bag. The items that we'll discuss from here on out are more along the lines of nice to have rather than much have gear. HygieneAt first, it seems strange to say that hygiene items aren't a necessity for a get home bag. Once you really start thinking about it, it makes a lot more sense. No one wants to be dirty, have bad breath or just stink in general, but none of these things are life-threatening in any way so that makes hygiene second to the items that we've already talked about.
As far as beg home bag hygiene goes, I like to add some kind of baby wipes or adult wipes and the little disposable toothbrushes that don't need toothpaste or water. Women probably want to have some kind of option to deal with feminine hygiene issues as well. Other than that, there isn't a whole lot that you need in this area. Other hygiene items you may want to consider:
LightA light source can easily be considered a requirement by some people for a get home bag. I personally wouldn't put one together without one, but it's also not a deal-breaker or going to keep you from getting home without a light of some kind. I usually go with a headlamp in all of my survival kits, and my get home bag is no different. It makes more sense to go with a headlamp in order to keep your hands free, but any kind of flashlight will work.
WeaponsIf you carry a pistol every day (and you should), it's a good idea to put additional ammo for your EDC pistol in your get home bag. 1 or 2 spare magazines is all you need. You're not looking to get into a shootout so you don't need to add a ton of weight to your bag when you should be doing everything in your power to avoid confrontation. Laws are different all over so having a pistol may not be possible for everyone. You can also add a fixed blade defensive knife, or a collapsible baton if they're legal for you to carry. Things like pepper spray are okay but I would rather have an actual weapon that you can defend yourself with than a deterrent like pepper spray. Pepper spray may make sense for you, but I stay away from it. If you happen to live in an area where you can't carry a weapon, then one of your first goals should be to get your hands on something that you can use to defend yourself. Be on the lookout for pipes, branches, even rocks while you're walking so you at least stand a chance if things go bad. Knife / Multi-toolIf you always carry a knife with you, then you're good to go and don't need to add another knife your get home bag list. It could still be beneficial to carry a multi-tool just in case you need one, but it's going to depend on your situation. A purpose-made defensive knife is useful if you can carry knives but not a firearm for defense. CommunicationFor a get home bag, your cell phone is probably enough for communication. Adding a radio to your list probably doesn't make sense for anyone. You can add a signal mirror or emergency whistle if you're looking for a way to signal to other people in an emergency. Cordage550 cord is usually the go to for everyone's survival kits. It's strong by itself and has multiple strands inside that you can use which makes it really versatile and pretty compact considering the amount of cordage that you can get from one length of 550 cord. 20-30 feet of 550 cord is all you need unless you have a special circumstance that requires more. Fire StartingOne or two Bic lighters are enough for your get home bag list. You probably won't need a fire but it's nice to be able to light one in case you need to warm up or have to boil water. BinocularsYou can find a pair of $20 binos these days that will do everything you need them to in a get home bag. Dust MaskDisasters can start fires, throw tons of dirt and dust into the air, and make it dangerous to breathe the air. An N95 approved dust mask will protect your lungs while you're leaving the area. You can try to wrap your face with a bandanna or shemagh but they aren't nearly as good at protecting your respiratory system as an N95 dust mask. Glasses / GogglesA cheap pair of goggles or impact rated glasses make a good addition to a get home bag. Protecting your eyes from dust and debris is good for obvious reasons. GlovesIt's always a good idea to have gloves on when you may have to deal with broken glass, debris or other things that can cut up your hands. The Mechanix Wear - MultiCam M-Pact Tactical Gloves are some of our favorites and they're about half the price of other tactical gloves. Money / IDMost of us will already have some form of ID on us so there isn't a need to add an additional ID unless you want to. Some cash in small denominations should be added to your get home bag list so you have some kind of means to buy additional food or water if power is out or you can't use a card. NavigationNavigation is minimal in a get home situation, but you still should add a map of the area between your workplace and your home with your primary route and alternate route on it. You should also do some research about the areas that you'll have to travel through and make note of any high crime areas, where you can get food and where you can find water. I add a compass just in case and have a GPS watch as part of my EDC. Your phone should also have a map app on it but it may not be usable during a disaster. What to Add to Your Get Home Bag List for Multi-day TravelIf you live more than 25 miles away from where you work, then you should plan for additional days of travel. If you live 25 - 50 miles away from work then you should good with just adding a little more food and making sure that you have some way to filter water. Those that live 50+ miles from work should look for more creative ways to make the trip. I like the idea of putting a folding bike in your trunk in case you ever need to get home under your own power. ConclusionWhen you're putting together your get home bag list, make sure that you're putting together the things that you need for your situation and not blindly following a list from anyone (including me). Seriously consider each item before you add it, and make sure that there is a specific purpose for it. As long as you follow those two guidelines, your get home bag is going to do its job and get you back to your family if there ever is an emergency. Get Home Bag List – 2020 Gear Guide to Get Home (With Downloadable PDF) is available on: https://readylifestyle.com/ via Blogger Get Home Bag List – 2020 Gear Guide to Get Home (With Downloadable PDF) What is an INCH Bag?Bug out bag discussions are everywhere and we all know what they are, but where does an INCH bag come in? The INCH bag is probably one of the less common survival kits out there, and it's also a survival kit that doesn't have strong support across the board from the preparedness community. What is an INCH bag? INCH stands for I'm Never Coming Home Again. An INCH bag is basically a bug out bag that's packed with gear that will allow you to go off into the wilderness and have all of the tools that you need to survive off the land indefinitely. Do you have what it takes to go into the wilderness with just a bunch of gear and survive forever? The INCH BagIf you've been around the preparedness community for any length of time, then you've probably read about bug out bags. Everyone writes about them, does videos about them and tries to sell you one with pop-ups and e-mail lists, but where does the INCH bag work into the grand scheme of survival kits? The INCH bag is an I'm Never Coming Home kit designed to let you go into the wilderness and survive without anything else. That sounds great, it honestly does, but is that really possible? Difference Between an INCH Bag and a Bug Out BagIf you just look at bug out bags and INCH bags side by side you're going to see a lot of similarities between them. They both provide you with the means to survive when you decide things have become so bad that you need to bug out, but they do it in very different ways. As an example, a bug out bag may have a bunch of MREs in it so you have something to eat, where an INCH bag will probably have traps or snares and a bow or rifle in it to allow you to catch food. It's two different ways to accomplish the same thing. The real difference, which drives what goes into both kits, is the philosophy behind each kit. A bug out bag is designed to get safely get you from your home to your bug out location. Then when you're at your bug out location, you have shelter, food, water, and a means to keep yourself going. An INCH bag is designed to get you from your home and into the wilderness so you can survive off the land indefinitely using the tools in the bag and the skills that you possess. Who Needs an INCH BagIf your plan is to walk into the woods and disappear forever if anything bad happens, then an INCH bag is for you. Keep in mind that you probably won't be able to do this alone, so hopefully, you're bringing your family with you or at least have some like-minded friends. Having a group is pretty much a necessity in all parts of preparedness, but it's especially true if you want to stay safe and stay alive in the wilderness. Do you need an INCH bag?Can one kit fit everything that you need to live indefinitely? Do you have the skills to keep yourself alive even if you have every piece of gear you need to make it happen? Do you live near a place that can provide you with food, water, and shelter forever? Even if you can answer yes to all of these questions, I still don't think that an INCH bag makes sense for almost anyone. My idea of surviving disasters and survival situations is to prepare and plan ahead of time so I can get through whatever is going on and get back to a semi-normal life as quickly as possible. A well thought out bug out plan and a bug out location with everything you need to start over is the way to get back to normal. Bugging out into the wilderness with a bag full of tools is just planning to force yourself into a survival situation for the foreseeable future, and then VERY slowly working your way back to some sort of normalcy. I guess you could plan to just drink when you can and eat what you can while living wherever you can but that's barely living in my mind. I wouldn't recommend trying to rely on an INCH bag under normal circumstances. If you already live in the middle of nowhere and you absolutely can't have a bug out location then it may make sense to have an INCH bag. I would still argue that if you can survive indefinitely in the wilderness then you're even better prepared to set up a bug out location and be able to relocate if you're forced out of your home. So do you need an INCH bag? Only if you CANNOT have a bug out location of some kind. I can't think of a reason why you couldn't have some kind of bug out location that you could use, but I also don't know everyone's situation so I'm not going to rule it out. What Should be in an INCH BagThis isn't an INCH bag packing list. This is just an overview of the types of gear that you'd need in an INCH bag. Everything that goes into an INCH bag is made for long term survival. This means that you're going to want tough, reliable tools that are going to last you for as long as possible. In most cases, you're not going to be able to easily replace a broken tool, so pack accordingly! WaterWhen you first head into the wild making sure that you have drinkable water is going to be one of your first priorities. Long term water is more about where you decide to live rather than anything else. As long as you set up camp near a water supply and brought steel containers that you can boil water in, you'll be good to go from a water standpoint. FoodFood production is going to take up a lot of your time. I would plan to have as many ways to passively grow and collect food as possible. The less time you need to spend finding food, the more time you'll have for other things. This is especially important for individuals and very small groups. Make sure that you know how to smoke and dry food to preserve it! Trapping/SnaringTrapping and snaring is a great way to passively catch food while you do other things. Just make sure that you bring enough snare wire because you usually only get to use them once. If you're near water you can also set up lines to catch fish for you. This trotline article does a great job of explaining how to get one set up. GardeningTake seeds with you so you can start a garden right away if the weather is good. I'd get as much land planted and growing food as fast as I could. Shelter MakingHaving a good hatchet and saw are going to make shelter building the easiest for you and should be considered required items in an INCH bag. There are a bunch of shelters that you can build with just a saw and a hatchet. FireFire goes without saying...you need fire to keep you warm, boil water and cook food. Ferro rods are a good long term option to get fires going but you're eventually going to have to rely on something like a hand drill, bow-drill or flint and steel. First AidLong term first aid is one of the most difficult things that you'll encounter with an INCH bag. You can only pack so much first aid gear in your kit and no matter how much you bring, you're eventually going to run out. I'd suggest packing things that are difficult to find or make in the wild. Things like antibiotic ointment, sterile gauze and dressings, etc. should probably make up a lot of your loadout if you really plan on staying out for a long time. A minor infection can quickly turn life-threatening if you don't have antibiotics and modern medicine. PowerIf you brought any kind of electronic devices, you're going to need some way to power them out in the middle of nowhere. This most likely means solar power and rechargeable batteries either in the device itself or in a separate battery charger. ConclusionAn INCH bag is designed to allow you to go into the wilderness and survive for an extended period of time. This means that you have to take everything that you can't make yourself and the tools that you'll need to make those things that you can. It also requires a TON of knowledge and skill. Overall, I don't think building an INCH bag is important and I certainly don't recommend that you decide to just head off into the woods following a disaster. Have a well-developed bug out plan and a fully supplied bug out location to go to and you'll be much better off. The article The INCH Bag – What Is It and Do You Need One is available on: https://readylifestyle.com via Blogger The INCH Bag – What Is It and Do You Need One Urban Get Home BagI believe that the get home bag is the survival kit that you're most likely to use. The chances of you being affected by a disaster are much higher in an urban environment than in other places. What is an urban get home bag? An urban get home bag is an emergency kit with the equipment that you need to get from where you are back to your home if an emergency occurs. An urban get home bag is specialized to meet the obstacles faced in an urban environment. Do you work or live in an urban environment? If you do, I suggest reading through this article to see what you should put in your get home bag so you can face that type of environment with gear that's tailored toward cities and suburbs. If you're looking for a general get home bag loadout, please check out our get home bag article. Why Would You Need an Urban Get Home Bag?Almost everyone works away from their homes and most of those people work in some kind of city or suburb that has a high population and, even worse, a high population density. This means that when a disaster stikes that area there are more people to get hurt, more people to try to push past to get where you need to go and more people to lose their minds and panic. This is where an urban get home bag comes in. The more time that you spend away from home, the more likely it is that when some kind of disaster hits, you'll be away from home and your family. An urban get home bag is designed to get you back home to your family. When everyone else is unprepared and panicking, you can relax knowing that you're prepared and start heading home. Urban areas are more likely to feel the effects of the following disasters:
Urban Get Home Bag BasicsThis get home bag is tailored to the needs of those of us that work in a city or other areas with a high population density. Most Americans work within 25 miles of where they live. This is also about the distance that an average person can walk in one day. Because of this, the basic idea behind this kit is that you have to walk from where you work, back to where you live and that trip will take you about one day. This assumes that there are probably cars blocking the roads, police not allowing traffic down the roads or some other kind of obstruction that's keeping you from driving home. If you can still drive home after a disaster, then you should. When you're trying to get home, drive for as far as you can and abandon your vehicle if you have to! This kit is there only as a last resort. Throughout this article, I'm going to discuss a lot of different options and the reasoning for bringing (or not bringing) certain things. Look at your situation and make educated decisions when you're packing your urban get home bag. Your Everyday CarryYour everyday carry (EDC) is the gear that you carry every day. These are things like your wallet/purse, ID, cell phone, concealed carry pistol, knife, etc. If you already have these with you, then there's no reason to add them to your get home bag unless you're in some kind of special cirumstance. If you have some reason to add more to your get home bag, then do what's right for you! Get Home BagsThe bag that you choose should be able to blend in with the city. It should look completely normal and not draw any undue attention to you. I like backpacks that don't have an overly tactical look, but they're getting more and more popular in offices and around cities so you can probably carry a so-called "tactical" backpack and never draw any attention from other people.
Backpacks like this North Face Unisex Classic Borealis Backpack fit the urban role really well. On the outside, there are two pouches for water bottles and an elastic cord that you can use to attach comfortable shoes and even some rain gear if you needed to. It also has the benefit of looking completely normal in just about any environment and it's mostly black which would make hiding with it a lot easier than if you had a bright backpack of some kind. Other than backpacks there are a ton of different shoulder bags and sling bags that you could use too. I would only go that route if you have a few hours to walk home because they usually can't carry as much and they just aren't as comfortable after that. WaterI consider water to be one of the few things that you really need in a get home bag. Walking 20+ miles a day requires some water even if you're not pouring sweat. It's even worse if you're walking down the city street in the middle of a hot summer day. Luckily, there are a lot of areas in the city that can provide you with water as long as you have some kind of water filter to make sure you're not going to get sick. You can find water in cities in these areas:
To just sit still and survive, you need at least 1 liter of water to keep going at an unhealthy level. Once you start doing anything, that quickly increases. I suggest having 2 liters of water in your get home bag (about 68 oz.).
I go with 2 of these 38 oz. Nalgene Stainless Bottles. They're a little heavier than other water bottles, but they give you the option to boil water to purify it and you can use them as a cooking container. You're probably not going to be cooking or boiling water over a fire on your way home, but the option is there if you need it.
Water filters are a good idea. The Sawyer MINI and Lifestraw are both small, lightweight and work well. The one that you choose is really up to personal preference or what you have available. [wc_box color="primary" text_align="left" margin_top="" margin_bottom="" class=""] If I had to choose between the LifeStraw and the Sawer MINI, I'd go with the MINI. It normally only a couple of dollars more than the LifeStraw and gives you the option to use it as a straw, attach it to a water bladder and squeeze water through it so you can filter water for a group. [/wc_box]
Another tempting option is to get an all in one water filter and water bottle like the LifeStraw Go Water Filter Bottle. This has the same water filtering capabilities as a regular LifeStraw. FoodEven if you're walking for three days straight, you technically don't need food. That being said, I'm not going to willingly not eat for three days and neither should you! I usually put a stripped-down MRE in my get home bag. Just pull all the non-food items out of it and take the foil-wrapped food pouches out of the cardboard, then reseal it with duct tape. You can also add some Clif Bars or other meal replacement/energy bars in there to keep you going without having to stop. FootwearHaving comfortable footwear is another key part of a get home bag. You're about to spend the next day or more walking so you should make sure that you have a pair of shoes that aren't going to tear up your feet. Either throw an old pair of sneakers in your bag, attach them to the outside, or just leave them in your trunk. That way you can change out of whatever you wear to work before you start walking. ShelterYou probably don't need to worry about shelter in a get home bag, but you may want to add a poncho if you think you may be going for a couple days. If you just want to cut as much weight as possible I'd suggest throwing a space blanket in there for some kind of emergency shelter. [wc_box color="primary" text_align="left" margin_top="" margin_bottom="" class=""] I'd suggest reading our Urban Survival Shelters article to learn about several types of shelters you can make in the city. [/wc_box] Shelter includes the clothing that you have on so make sure you take that into consideration. As an example, if you're wearing a heavy coat, decent gloves, and a beanie, then you can probably still get by with just a poncho to keep you from getting wet if you have to sleep for a few hours. Use common sense and think about your situation. First Aid KitA first aid kit is pretty much a requirement for any kit that you're going to rely on during an emergency. The standard first aid loadout that I recommend is the Adventure Medical .5 Kit, the Adventure Medical Trauma Pak, and the SWAT-T Tourniquet. Together they give you the ability to treat small cuts and injuries and also let you treat severe trauma like gunshot wounds or traumatic amputations. If you have any special medical needs or medications that you have to have, you should also add what you need to treat them. For example, if you're allergic to bee stings you should have an epi-pen. HygieneHygiene isn't a huge concern if you're just walking for one day. You can clean yourself when you get home. It gets more important if you have to travel for multiple days, but even then, it's not all that critical. A pack of baby wipes and some toilet paper rolled up in a ziplock bag is probably more than enough even if you have to go for several days. You can add something like these Crest Mini Brushes so you can brush your teeth but it's not necessary. LightFor a light source, I suggest a quality headlamp like the PETZL - TACTIKKA + Headlamp. I just find a headlamp to be much more useful while walking than a flashlight. If you prefer flashlights over a headlamp there's absolutely nothing wrong with that. It all comes down to what you like and what's going to work best for you. WeaponsIn an urban get home bag, you really need to think about what you need from a weapon standpoint. You're probably the most likely to need a weapon in a high population area, but you're also more likely to not be legally able to carry weapons and have to interact with the police. It's a difficult decision. You should at least have a knife that's legal in your area for defense, but I would only suggest that if you can't legally carry anything else. If carrying a firearm is an option for you then you really should go that route. A short-barreled AR or AK pistol are at the top of my list for getting out of an urban area. If those aren't available to you then go with a reliable pistol like the Glock 19/17 or M&P 9. KnifeA knife should be part of your EDC. As long as you're carrying one then I wouldn't add another one to your get home bag. The only time I would add a separate knife is if you're going to be relying on it for defense. If you can't carry a gun and need a knife for protection, then I would suggest adding the largest knife you can legally carry in your area to your bag. That way you can carry a smaller knife as part of your EDC and have a bigger knife for defense that probably would draw unwanted attention if you carried it every day to the office. Multi-toolJust about any Gerber or Leatherman will work in your kit. If you have an extra one at home, just throw it in your bag and you should be good. If you're going to buy something specifically to build your get home bag, then something like the Gerber Suspension fits the role perfectly. I normally go with a Gerber because I like their stuff, especially their newer models, but as long as you have a decent multi-tool you're good. The only thing I'd recommend against is buying a no-name cheapo model. I've had too many of them break just when I really needed them. CommunicationYou can fill the communication aspect of your get home bag with the cell phone you carry every day. I'd also suggest adding an extra battery or a battery pack as well. You never know when you'll need to head out and it could be at the end of the day with a nearly dead phone. You can also add a signal mirror and an emergency whistle if you want to have some ability to signal to others in an emergency. Cordage550 cord is pretty much the standard for cordage in survival kits. You're probably not going to need much in the way of 550 cord, but adding 10 - 25 feet just in case can give you some options to build shelters if you get stuck along the way home. Fire StartingThis isn't supposed to be a bush crafting kit! Add one or two Bic lighters and call it a day. If you have a reason to go above that then, by all means, add as much fire building stuff as you want. I just personally can't see a reason for it. BinocularsIt may seem strange to put binoculars in an urban get home bag, but I think it makes a lot of sense! You can see for quite a long way in some cities and other high-population areas which lets binoculars really shine. If you have a small, lightweight pair of binos in your kit, you can check out crowds from a distance to see if they're armed, watch police checkpoints to see if they're checking IDs or taking weapons, you can also scout out a choke point up ahead before you're too close to try to go around our choose a new route. Not having binos means that you need to get much closer before you can make an accurate assessment of what's ahead. Protective GearCertain types of disasters that could affect urban areas make it necessary to protect your hands, eyes, and lungs. Consider adding these to your urban get home bag:
Dust, ashes and airborne particles are all very likely in many natural and man-made disasters. Earthquakes can cause buildings to collapse and fires can run rampant in some areas or be started by rioters. You can always try to wrap a dust towel or shemagh around your face but an N95 mask is going to be a lot better. Money/IDThese should be part of your everyday carry, but it's also a good idea to add some cash to your urban get home bag so it's there just in case. If you have an extra photo ID it may be worth it to add it to your kit, but I rely on the fact that I always carry an ID. Maps and NavigationDon't overlook the need to have maps of the local area. Even though you may drive to work every day and can find your way home in your sleep, it doesn't mean that that route is going to be the best way to walk home and it doesn't mean that you're going to know the best route to walk home! I suggest having a primary and alternate walking route marked on your map. It also makes sense to mark points of interest like areas where you can find water, chokepoints or high crime/gang areas that you may need to pass through or travel near. When you're planning your routes, only go through "bad" areas if you absolutely have to! You can also pack a GPS in your kit or wear a GPS enabled watch as part of your EDC, but that's going to double or triple the cost of your get home bag. A compass is the cheapest way to have a real navigation device in your kit, or you can try to rely on your phone if you absolutely have to. Additional ConsiderationsUrban environments add a lot of complexity to survival situations. When you have so many people in close proximity to each other things can get ugly really fast! It's not always possible to plan for what we can't predict, but you can look at your situation and try to think through the logical reactions that people in your area may have. Are the police likely to try to prevent people from getting from place to place? Are riots likey? Is it possible for criminal activity to pick up during a disaster? Any or all of these could affect your ability to get home after a disaster. Packing for travel longer than 1 dayMy first suggestion if it's going to take you several days to get home on foot is going to be to try to find a job that's closer to home. I know this really isn't an option for many people but if you're really serious about preparedness, then it's the best option. The good thing about packing for multiple days is that it doesn't add a ton of extra weight to your bag! Add more of these items to stretch your kit out for additional days:
ConclusionThe urban get home bag is probably the one emergency kit you're most likely to use. If you work in a less population-dense area then you can probably make the drive home without any problems. When you pack a ton of people into a small space, it doesn't take a lot to completely jam up the streets and make them unpassable. That's when this kit shines and can make the difference between life and death. The previous post Urban Get Home Bag – Get Out of the City and Back to Your Family is courtesy of: Ready Lifestyle Prepping via Blogger Urban Get Home Bag – Get Out of the City and Back to Your Family |
AuthorReady Lifestyle aims to provide its readers with solid information and thought provoking articles about all things prepping, readiness, home and personal defense, and the potential repercussions of a collapse. |
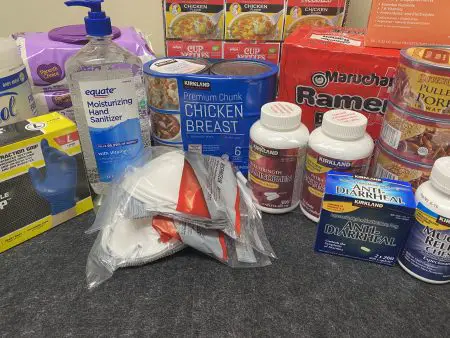
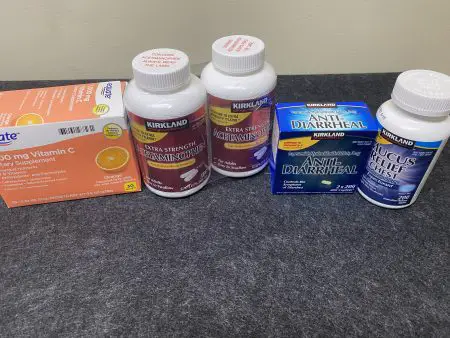

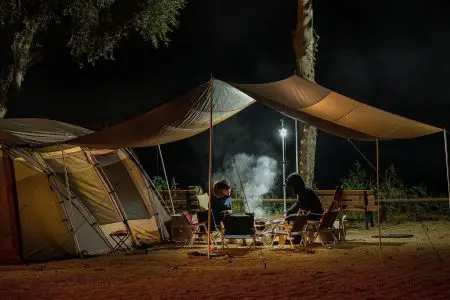
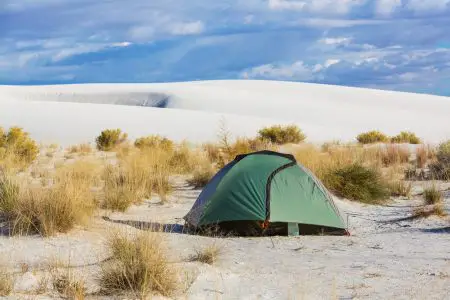
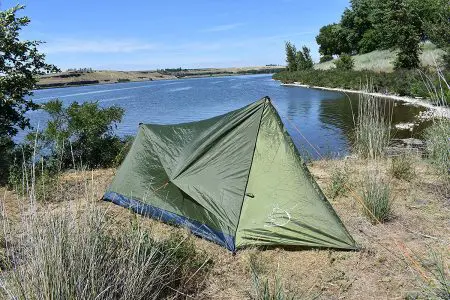
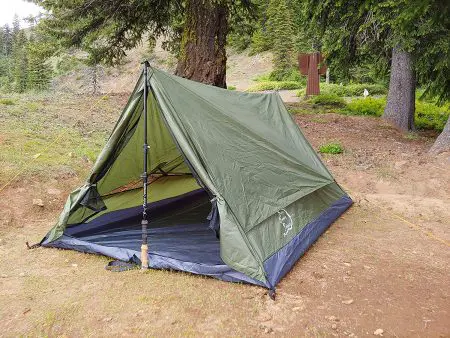

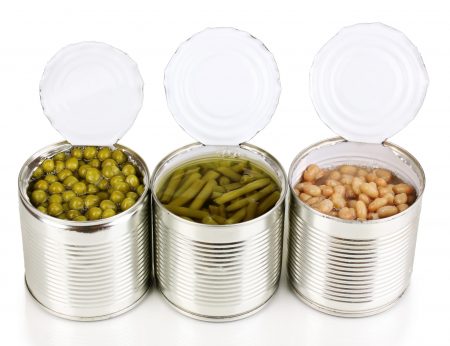
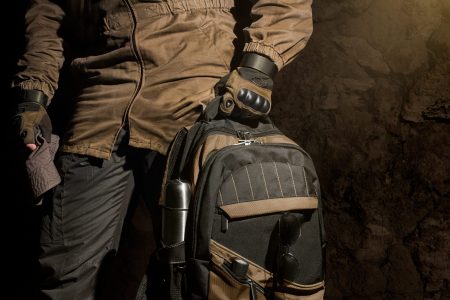
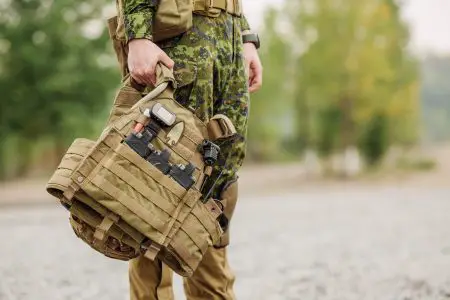

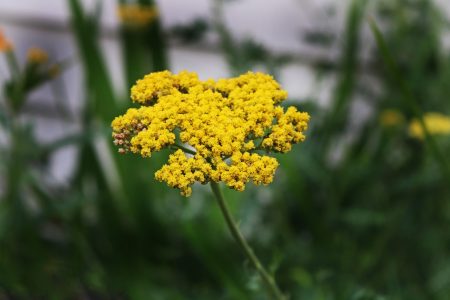


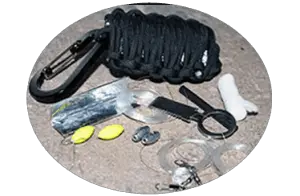
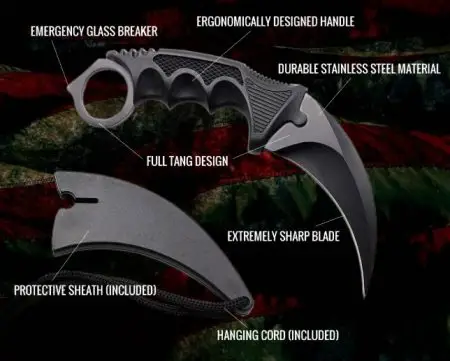
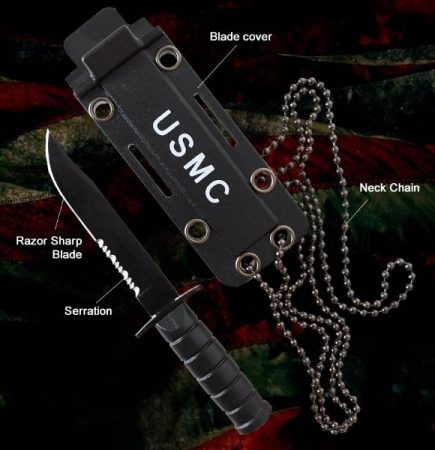
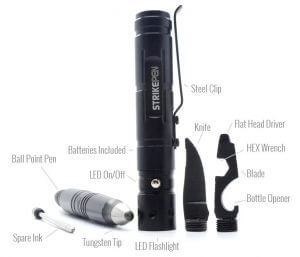

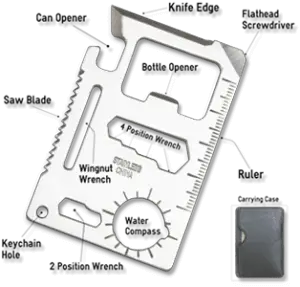

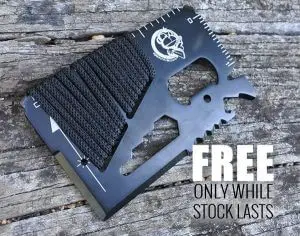
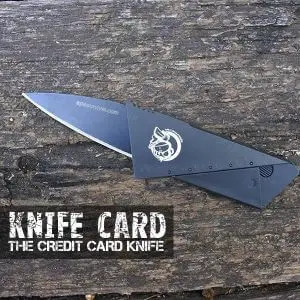
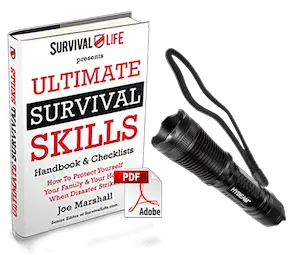

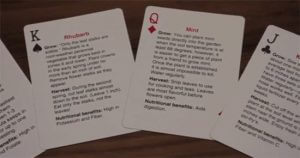
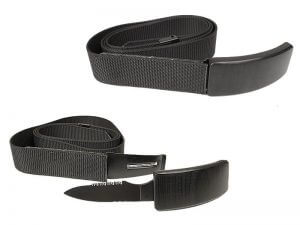

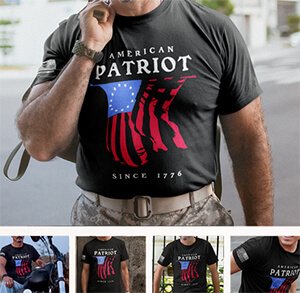
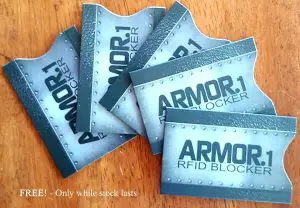


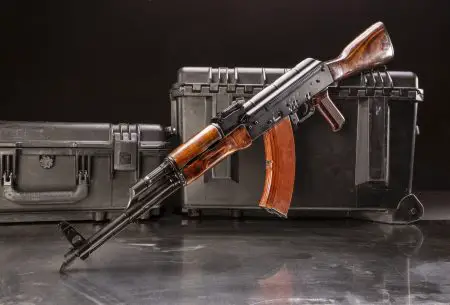
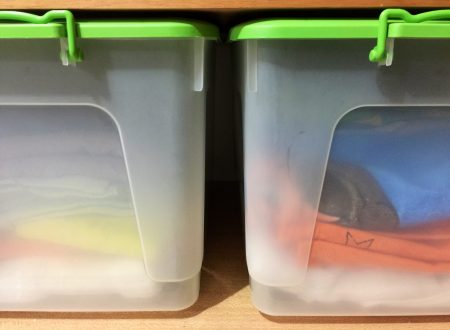
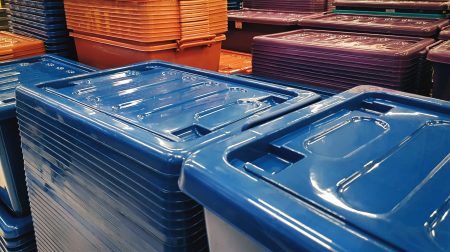

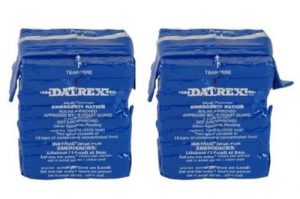
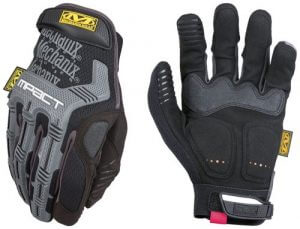


 RSS Feed
